Create a CalDAV connection
If you want to sync your roundcube calendar with an external client, you must create a so-called CalDAV connection. In this guide, we go through how to set up a CalDAV connection in RoundCube - Webmail.
Start by logging into your webmail. Here is a guide on how to log into your webmail
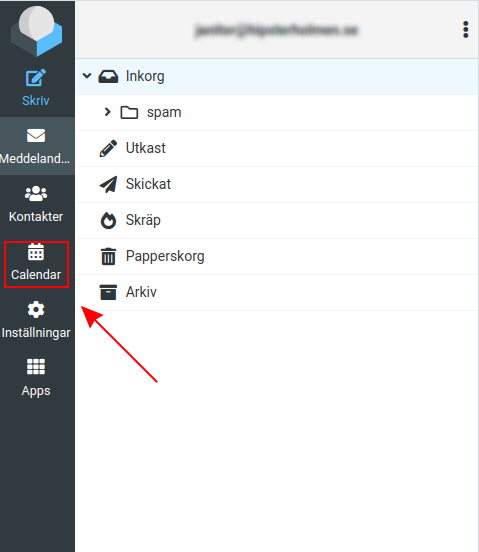
Then click on the calendar icon in the menu
Hover your mouse over your calendar to bring up the pencil on the right
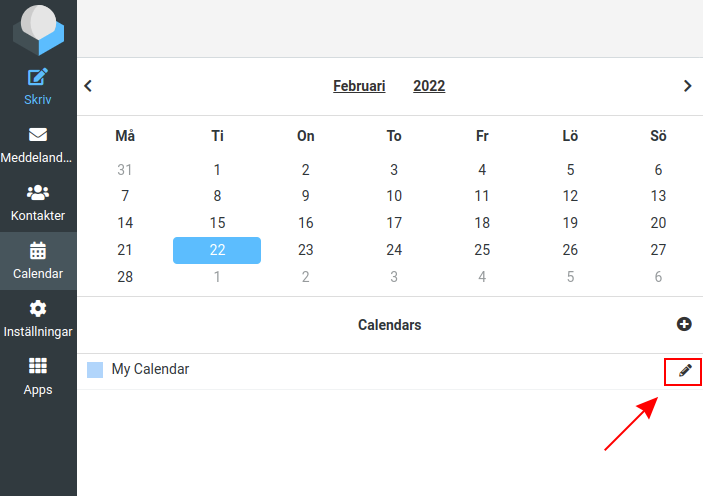
then click on "Sync calendar" in the menu

Here you set up the CalDav connection itself.
1 Choose the name you want for the connection
2 Choose a password you want for the connection.
3 Here you set whether the calendar should not be changed through the connection. If you enable Read Only, you will not be able to add or remove events to your calendar through the client. The recommendation is to leave it disabled.
4 Then click "Add" to save the settings*

Here you see a summary for your CalDav connection. You need these settings when you synchronize your calendar to an external client.

To add your calendar to Thunderbird, you can follow this Guide: Thunderbird
To add your calendar to your iPhone/iPad, you can follow this Guide: [iPhone/iPad](https://login.inleed.net/helpcenter/email/lagg-till-din-roundcube-calender-i- your-iphone-caldav)
 English
 Swedish
 French