This guide goes through how to easily activate LiteSpeed Cache on your website directly via the Customer Zone.
We have made it super easy for you as a customer to activate LiteSpeed Cache on your website in order to give it a real boost in speed. Today, this feature only works for websites made in Wordpress.
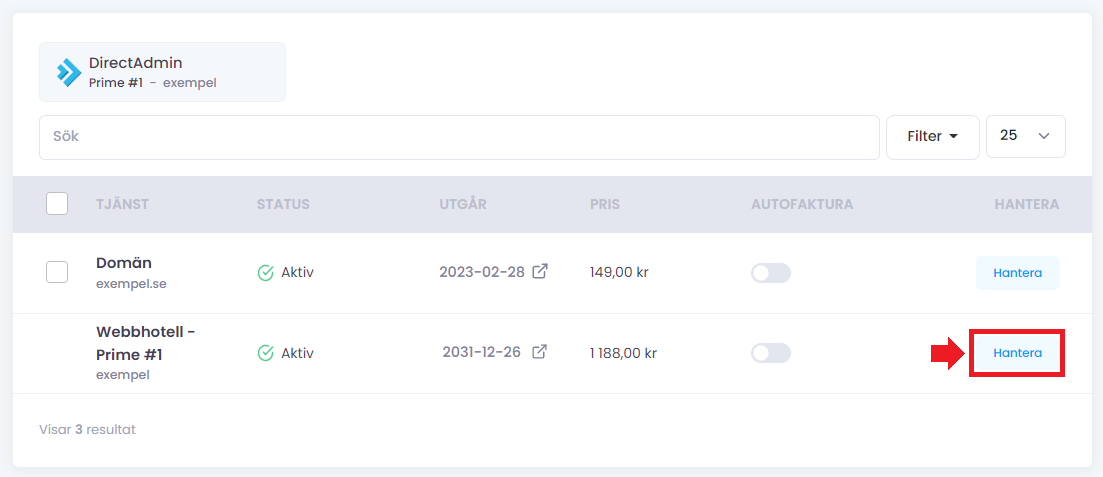
BStart by going to the management page of the web host that has the website you want to enable LiteSpeed Cache on. You do this by clicking the Manage button for that hosting.
Enable LiteSpeed Cache
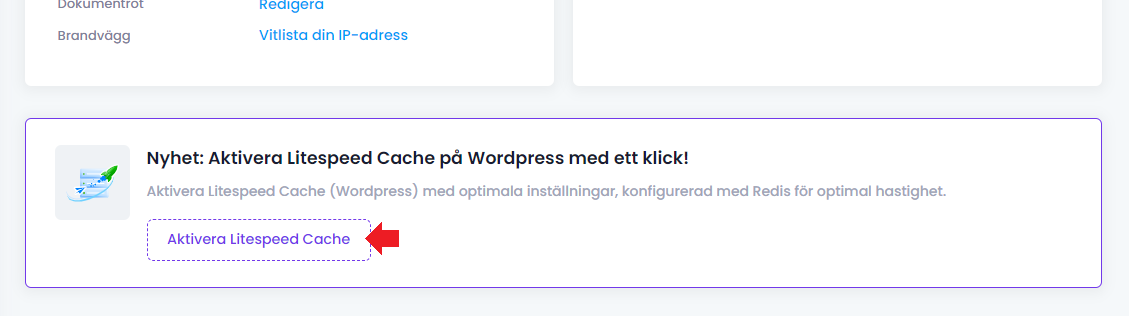
Well inside the hosting management page you can enable LiteSpeed Cache by clicking the Enable LiteSpeed Cache button at the bottom of the page.
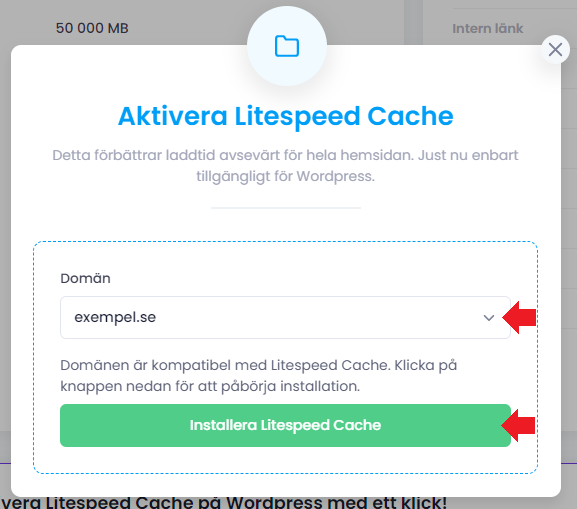
Select which domain you want to enable LiteSpeed Cache for
When you click the Activate LiteSpeed Cache button, a box appears where you must select which domain you want to activate LiteSpeed Cache for. After you have selected which domain you want to enable LiteSpeed Cache for, then click the Install LiteSpeed Cache button.
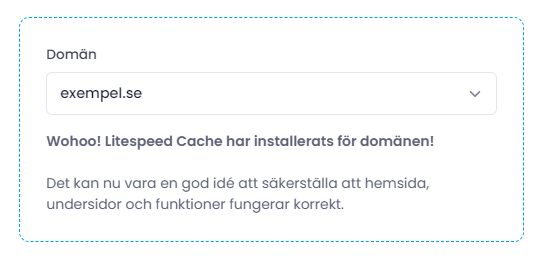
It will take a little while before the installation of LiteSpeed Cache is complete, but as soon as it is complete, you will be notified that the installation is complete.
 English
 Swedish
 French