In this guide, we go through how to connect the Redis Object Cache to your Wordpress page
Activate the Redis module
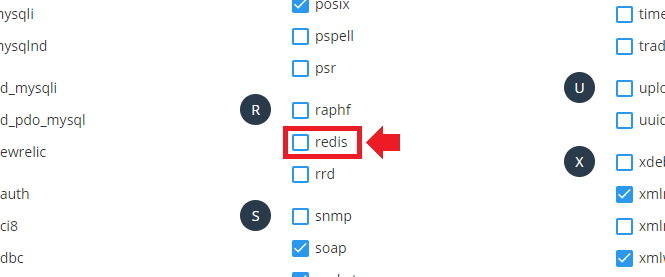
Redis is a module for PHP, which you activate via DirectAdmin -> Extra Features -> Select PHP version.
Create a Redis instance
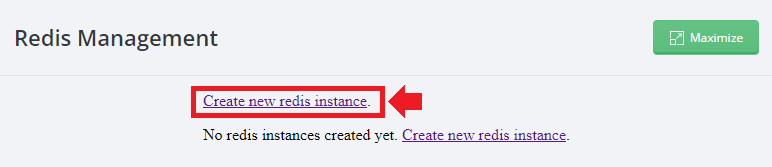
After you have activated the PHP module Redis, you then need to create a Redis.instance. You need to create a new Redis instance for each new page you want to connect Redis to. To create a Redis instance, go to DirectAdmin -> Extra Features -> Redis Management. Then click on the text Create new redis instance.
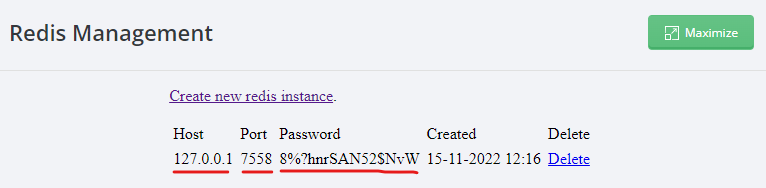
When you have created the Redis instance, the instance information is then displayed line by line. If you create more Redis instances, more rows will be displayed. These details are the details you will use to configure Redis Object Cache on your page.
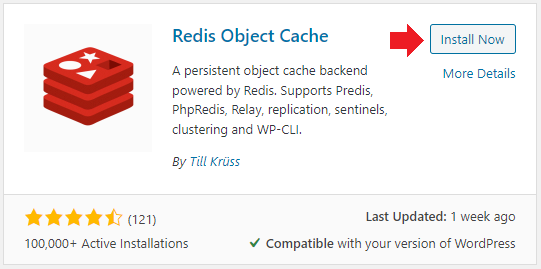
Install Redis Object Cache on Wordpress The
Plugin Redis Object Cache installs you directly via the Wordpress administration panel on the page Additions/Plugins -> Add new. Then search for Redis Object Cache in the search bar, and install the Redis Object Cache plugin and then activate it.
After you activate the plugin, you should activate the Object Cache Cache.
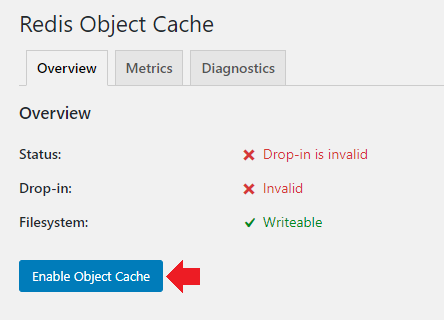
When you have activated the Object Cache, the Drop-in status should become Valid

Configure Redis Object Cache
To get the Redis Object Cache up and running, you now need to add the Redis instance details (See step Create a Redis instance) in your wp-config.php file for the homepage . You can connect to the Web Hosting via an FTP program or use DirectAdmin`s File Manager to access the Wordpress wp-config.php file.
OIf you choose to use DirectAdmin`s File Manager to edit the wp-config.php file, go to DirectAdmin -> System Info & Files -> File Manger. Then you navigate to domains -> dindomän.se -> public_html. In this directory you should then be able to find find wp-config.php.
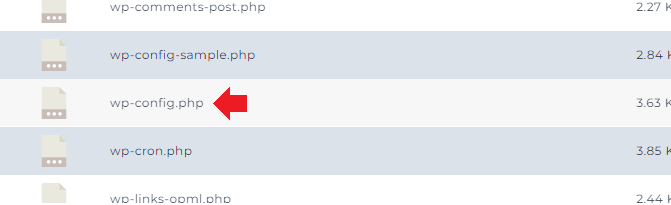
Double click on wp-config.php- file to edit it. In that file, you should then add the Redis instance details. Copy below text and then paste it into your wp-config.php file.
Replace an-example-domain.com with your domain name. Replace redis-host with 127.0.0.1 Replace redis -port with the port number you got on the Redis Management page in DirectAdmin Replace redis-password with the password you got on the Redis Management page in DirectAdmin
define(`WP_CACHE_KEY_SALT`, `an-example-domain .com`);
define(`WP_CACHE`, true);
define(`WP_REDIS_HOST`, `redis-host`);
define(`WP_REDIS_PORT`, redis-port);
define(`WP_REDIS_PASSWORD`, `redis-password`) ;
You should paste this information directly after the database information in the wp-config.php file. See below image for reference.
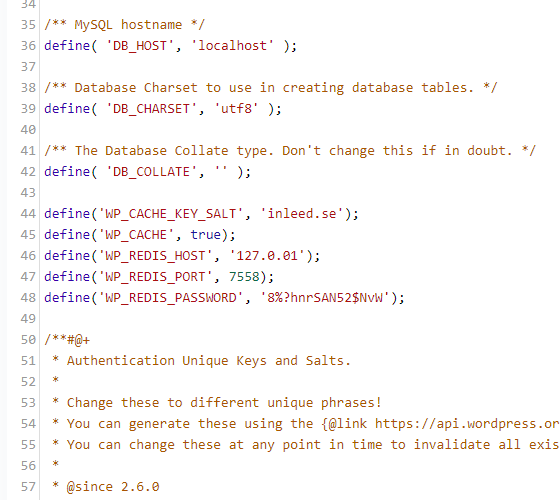
Then click Save to save the change in wp-config.php file.
Check that Redis Object Cache is connected
After you have added the Redis instance information to the wp-config.php file, you should then go back to the Redis plugins settings page inside the Wordpress Administration Panel. If youve done it right, the Status should read as Connected and connection information should be displayed below.
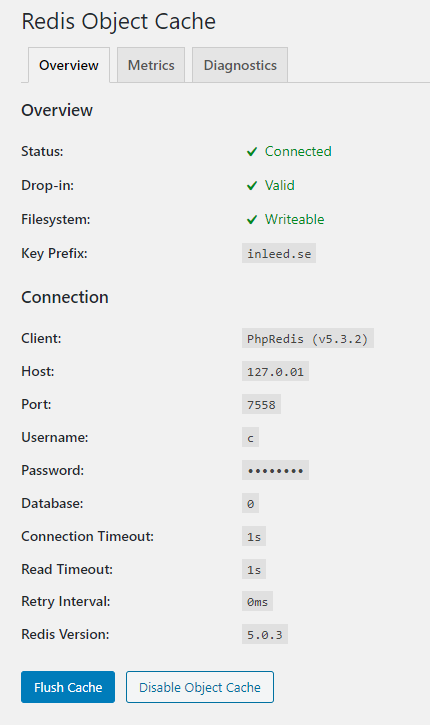
Now it`s done!
 English
 Swedish
 French