In this guide, we go through how to set up packages for your users in Direct Admin.
As a reseller, you often want to be able to offer a range of different services and opportunities. Here you can post tailor-made packages for different purposes. In this guide we explain a little what the different fields mean. By default there are no packages entered and to be able to add a new user there must be at least one package activated.
Start by logging in to Direct Admin. If you are not sure how to do it, you can follow this guide
Navigate to:
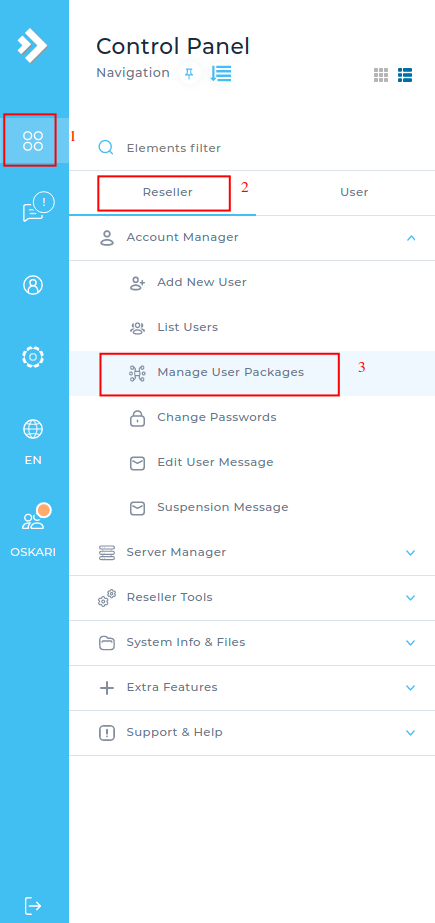
- The four points on the left in the menu
- Make sure you are under the "Reseller" view and click on Account Manager
- Click on "Manage User Packages
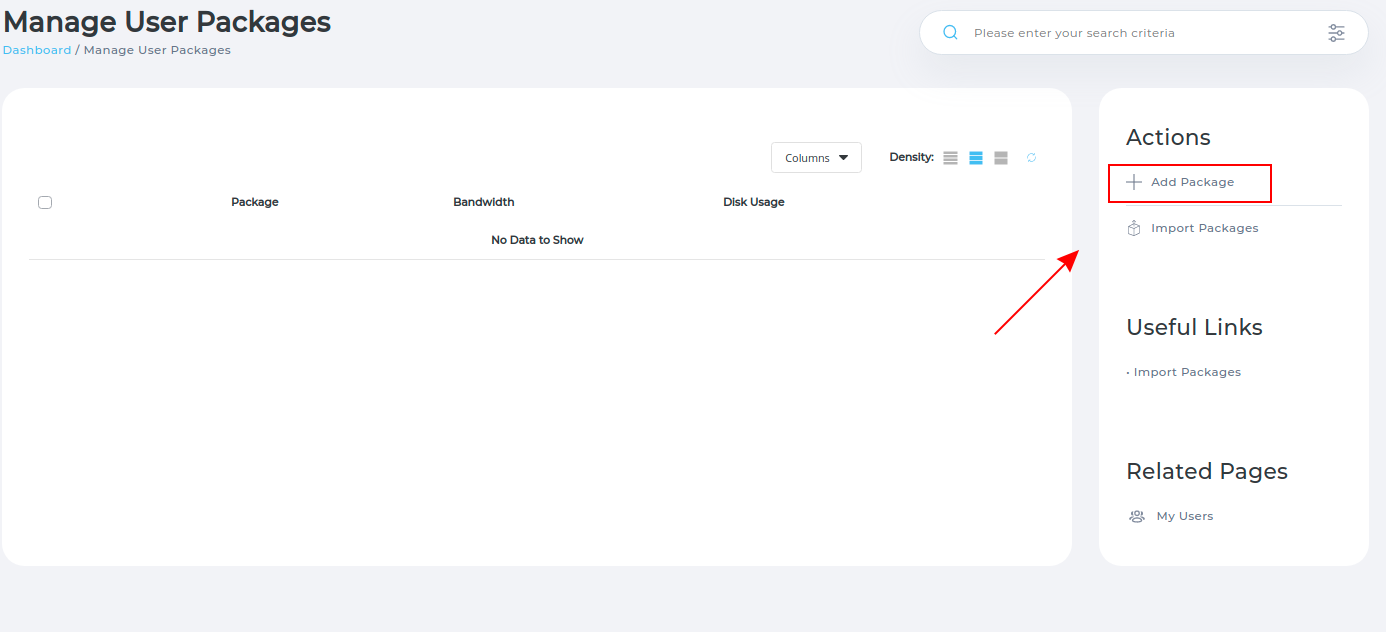
Here you have an overview of the packages you have. To add a package, click on "+ Add package".
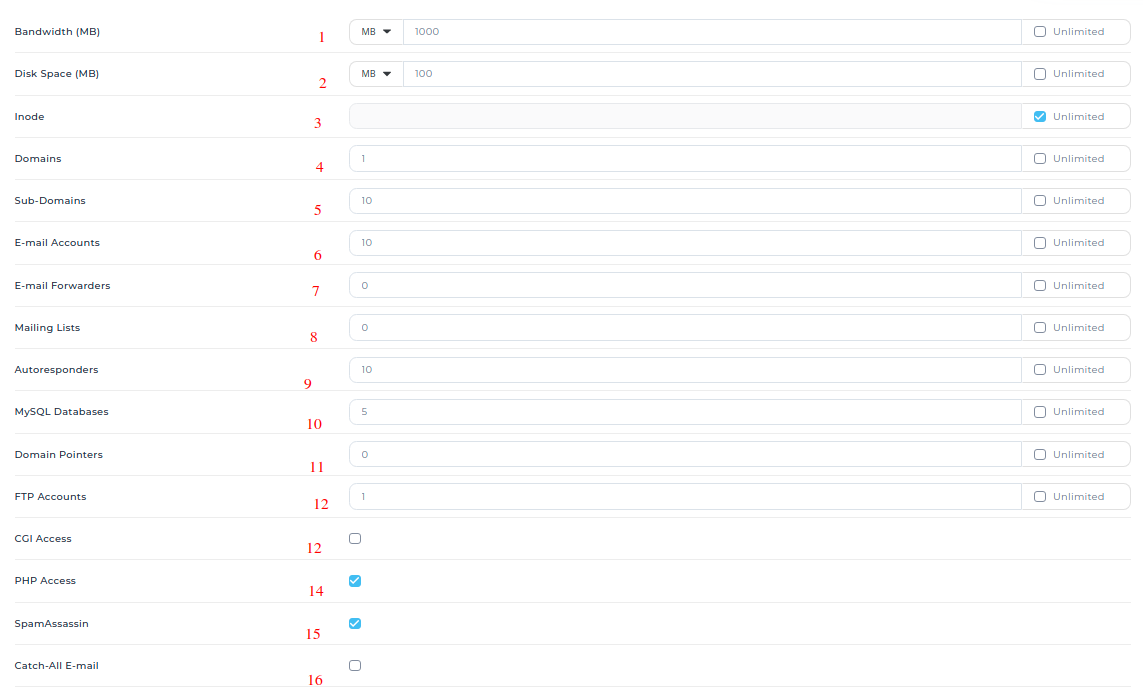
Here you set what your package should contain. In the list below you have an explanation for the different fields. (If you tick Unlimited to the right of the fields means that users with the package share the total resources of the main account)
-
Bandwith (MB) = How much bandwidth in Megabyte the package should allow.
-
Disk Space = How much space may be used
-
Inode = The number of files that may be uploaded (The recommendation is to leave it Unlimited)
-
Domains = The number of domains that are allowed
-
Sub-domains = The number of subdomains allowed 6.E-mail Accounts = How many E-mail accounts are allowed to be created 7.E-mail Forwarders = The number of forwarders that are to eat for mail
-
Mailing Lists = The number of mailing lists that may be used
-
Autoresponders = How many Autoresponders to emails may be entered
-
MySQL Databases = The number of databases you get access to
-
Domain Pointers = The number of Domain Pointers that may be added to
-
FTP Accounts = The number of FTP accounts allowed to be created
-
CGI Access = Here you set whether the package should allow access to CGI
-
PHP Access = Here you set whether the package should allow access to PHP (The recommendation is to leave it on)
-
SpamAssassin = Here you set whether you should be able to access SpamAssassin, which is our tool for spam management for e-mail.
-
Catch-ALL E-mail = Here you set whether you should be able to add Catch-All to the account
-
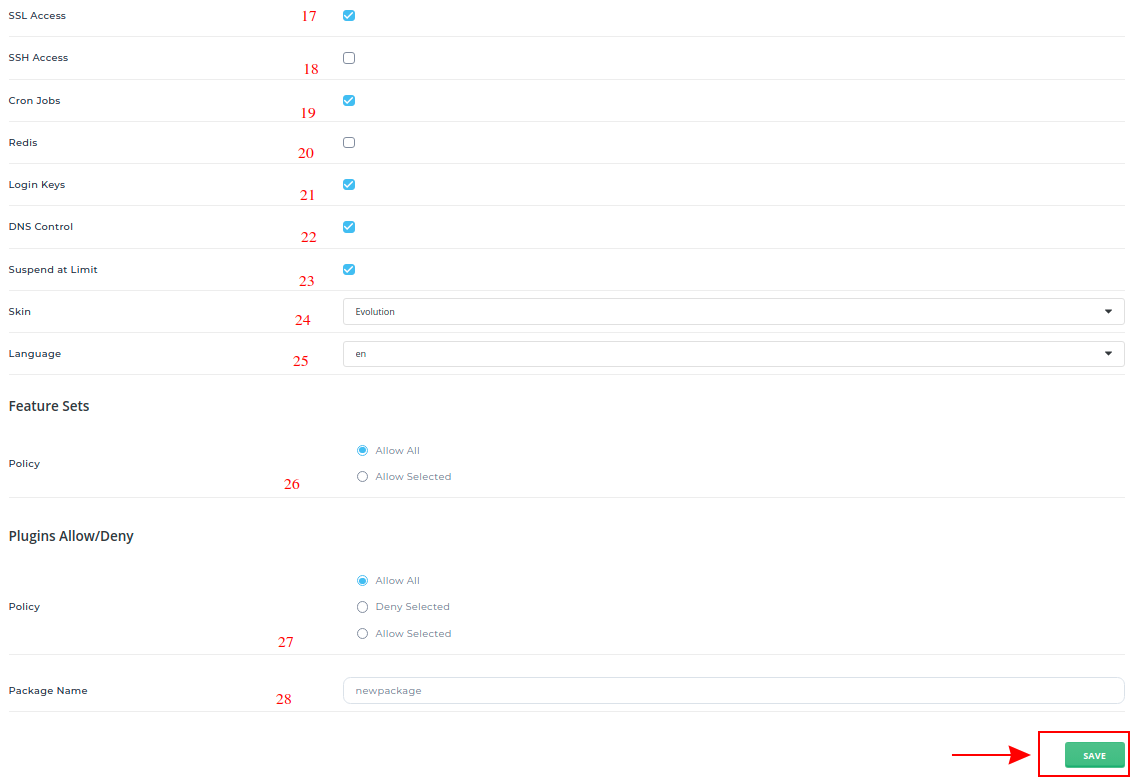
SSL Access = Here you specify whether to get access to SSL
-
SSH Access = Enable SSH if customers with the package should be able to connect to their account via SSH
-
Cron Jobs = Here you set whether to allow cron job
-
Redis = Here you set whether Redis should be available
-
Login Keys = Here you set whether to allow Login Keys. So temporary login keys for the account.
-
DNS Control = Here you set whether customers should be able to manage their own DNS settings
-
Suspend at Limit = Activate Suspend at Limit if the account should be locked when the resource usage reaches the limit
-
Skin = Here you set which theme to use for accounts that have the current package.
-
Language = Here you set which language should be activated
-
Feature Sets - Policy = Here you set whether the account should only be available for E-mail or only for DNS management. Core Functions provide access to all basic functions.
-
Plugins Allow/Deny - Policy = Here you set which functions should be active for the account. The recommendation is that you leave it on "Allow All".
-
Package Name = Here you choose what to name your package.
-
When you have filled in all the information, click "save" to upload the package.
 English
 Swedish
 French